Set up Automatic License Provisioning for Microsoft Azure AD
It is recommended you complete the MindManager single sign-on (SSO) setup process before starting automatic provisioning. This allows your end users to use their existing Microsoft account to sign in to MindManager as a licensed user immediately following a successful automatic provisioning setup. For more information, see Single sign-on (SSO) setup.
Automatic provisioning will still work without SSO setup, but your end users will have to create MindManager accounts matching the email addresses synced from Azure to access their license.
We recommend that any group in Microsoft Azure you sync with MindManager licenses has the same number of users as the number of seats on your MindManager license. When all seats are filled, any additional users Microsoft Azure tries to sync with MindManager licenses are rejected, and rejected users will be blocked. Microsoft controls the order of users synced, so rejected users are randomized.
To prepare for setup

2
On the MindManager license you wish to automatically provision licenses for, click
Administrate.
3
Click the
Add/Manage Users button.
4
In the Add/Manage Users dialog, click
Automatic Provisioning.
5
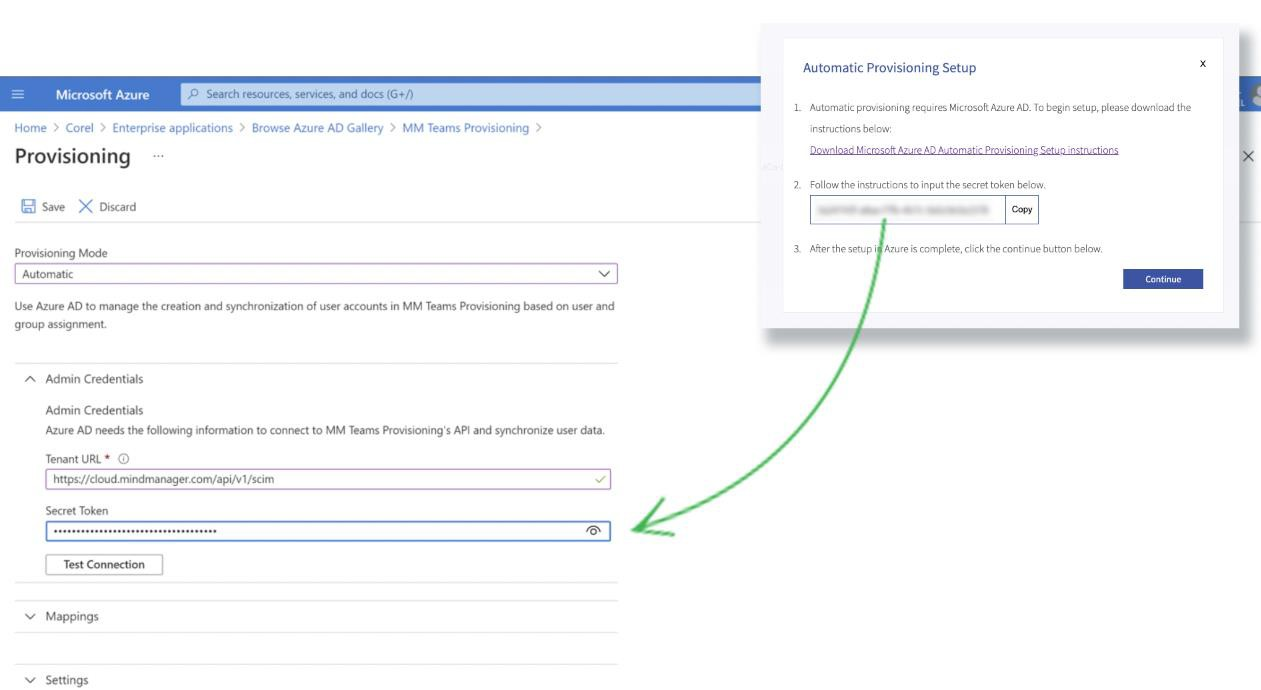
Copy your Secret Token.
To set up your Azure directory
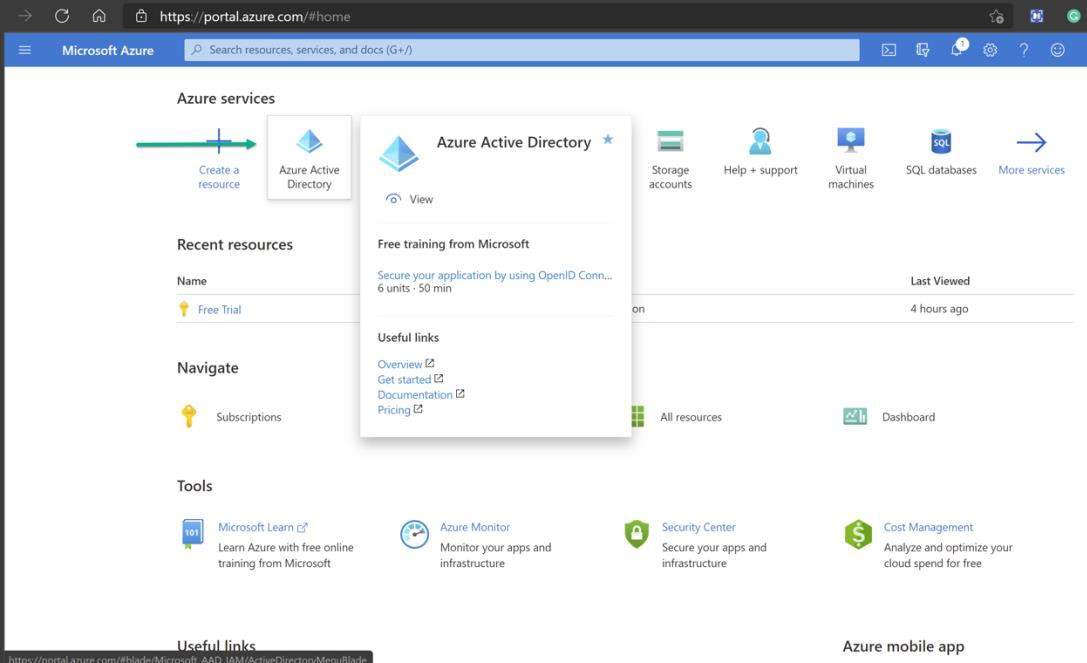
2
Click
Azure Active Directory.
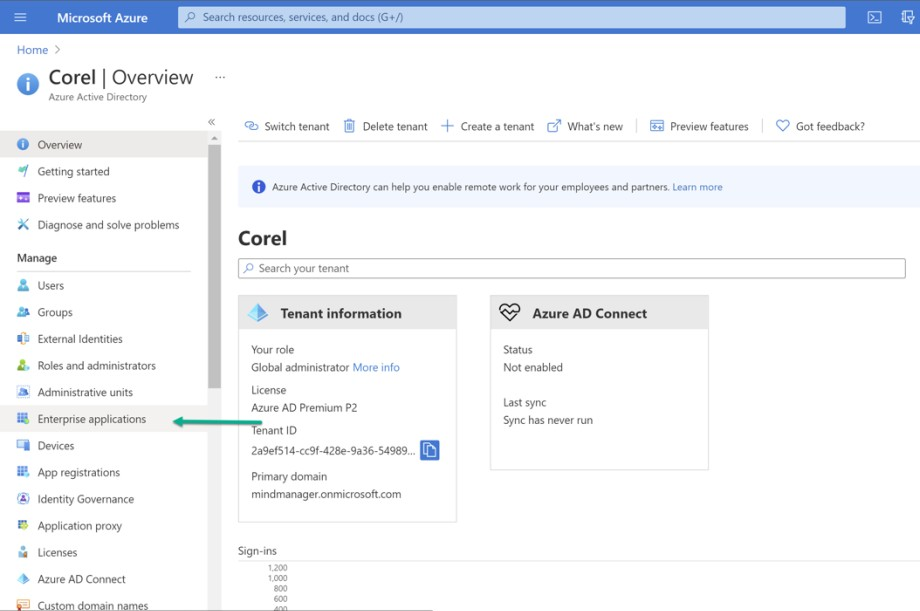
3
Click
Enterprise applications in the left panel.
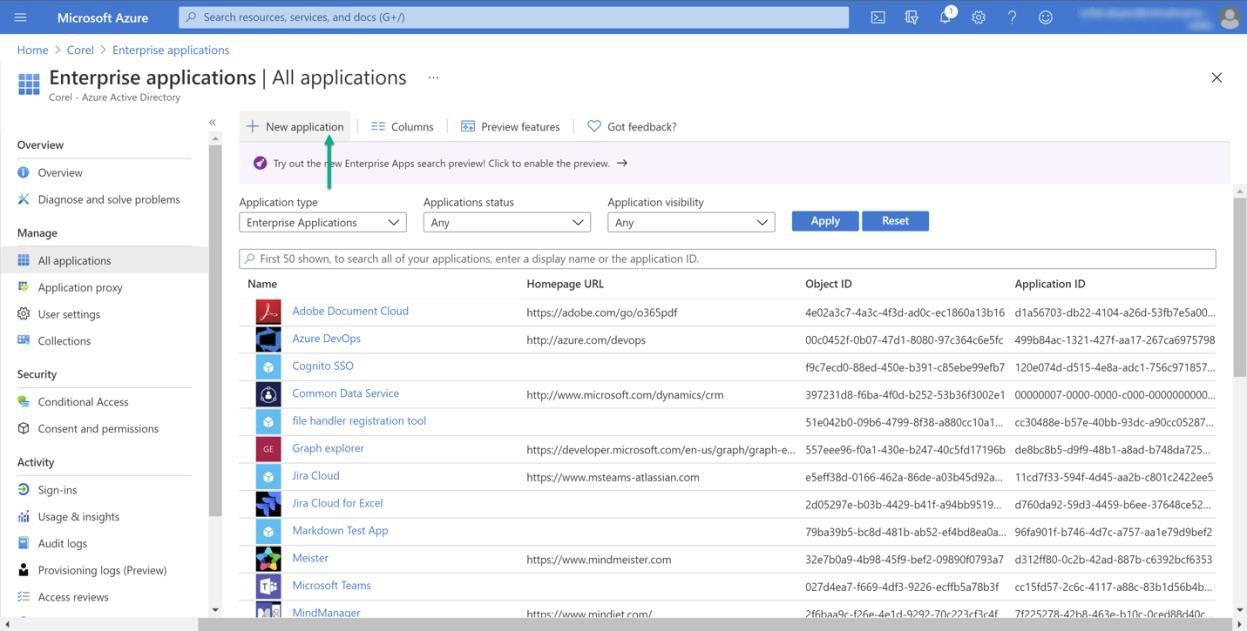
4
Click
New applications in the left panel.
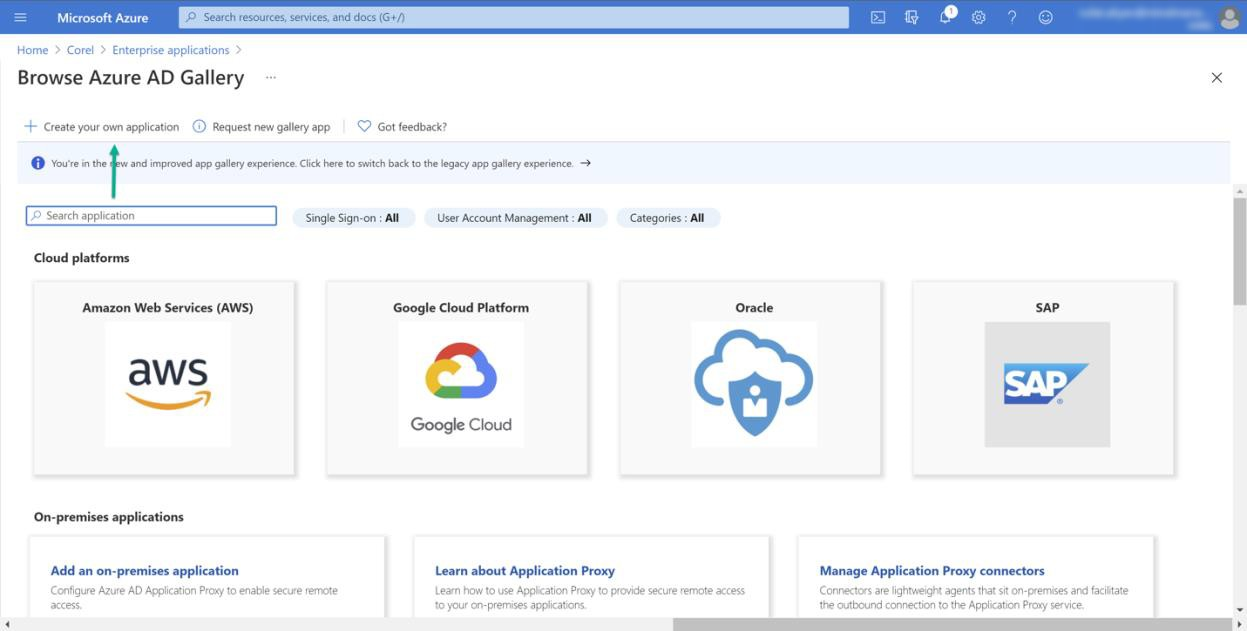
5
Click
Create your own application.
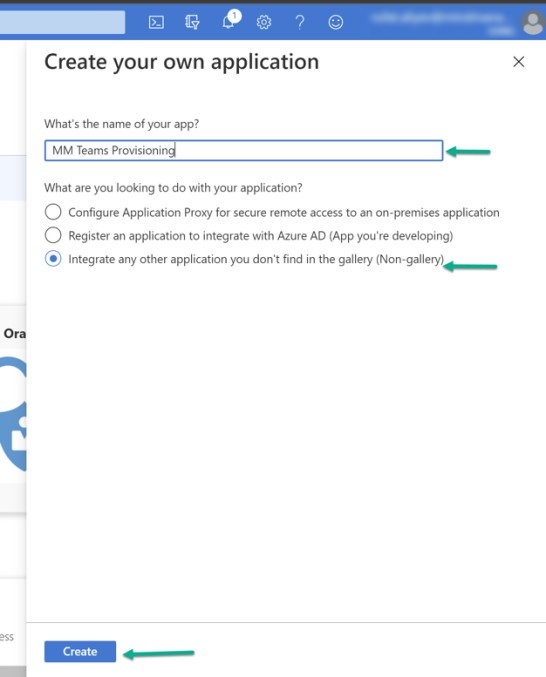
6
In the
What’s the name of your app? box, enter
MindManager Automatic License Provisioning.
7
In the
What are you looking to do with your application? area, enable
Integrate any other application you don't find in the gallery (Non-gallery).
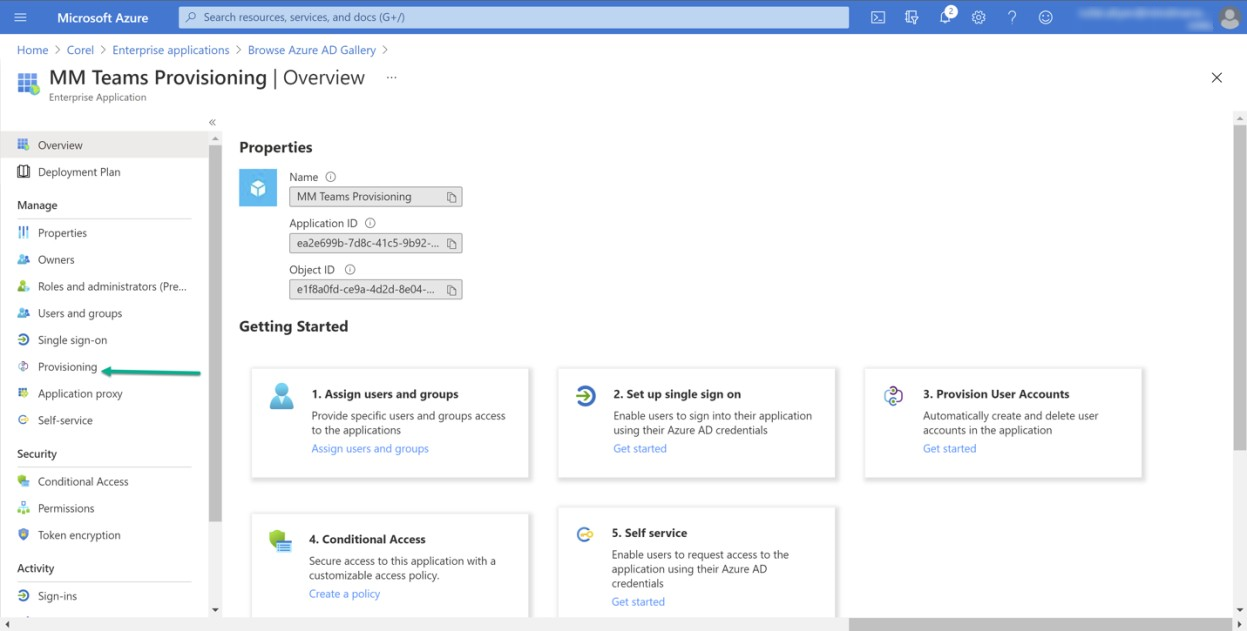
9
After your new application has been created, click
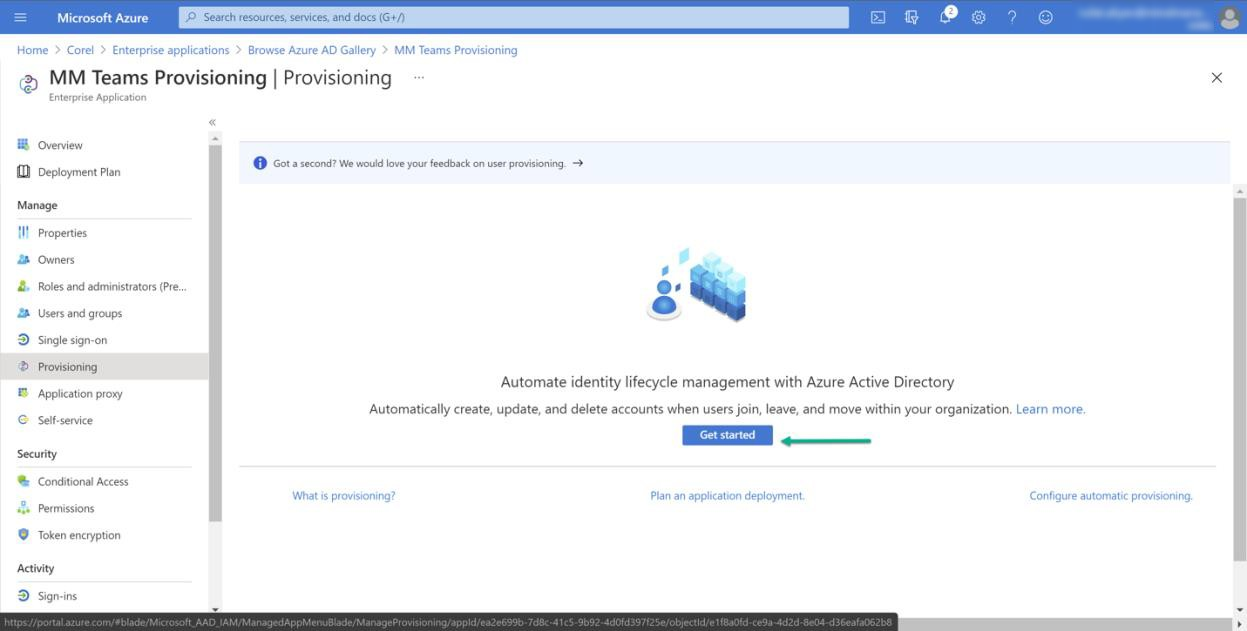
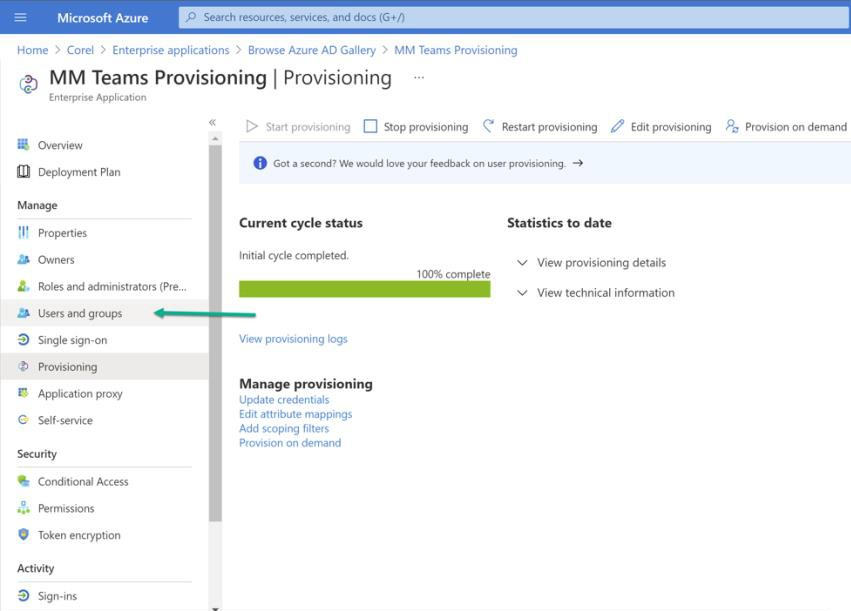
Provisioning in the left panel.
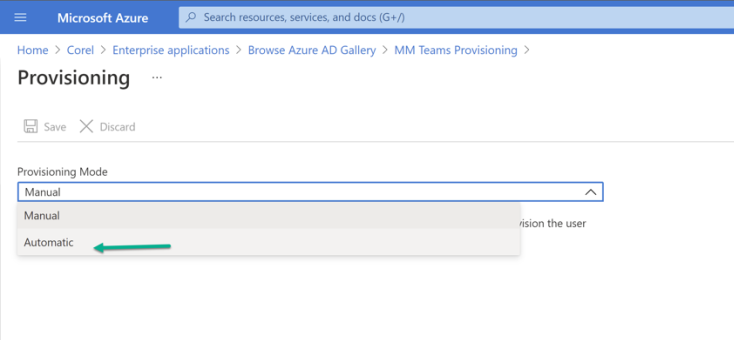
11
Select
Automatic from the
Provisioning Mode drop-down menu.
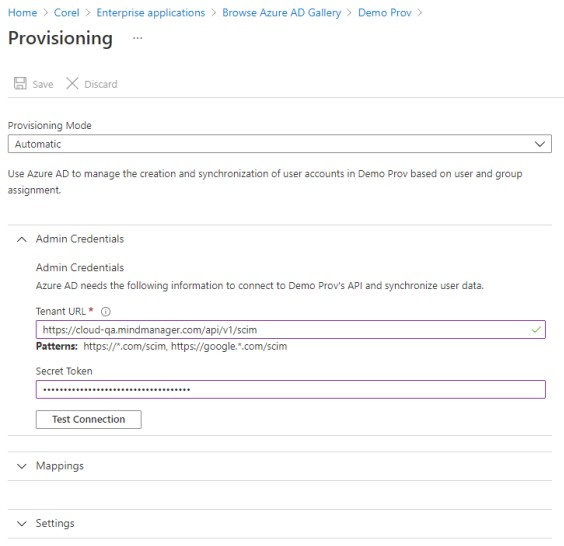
12
Copy this URL:
https://cloud.mindmanager.com/api/v1/scim.
13
Paste the URL into the
Tenant URL field.
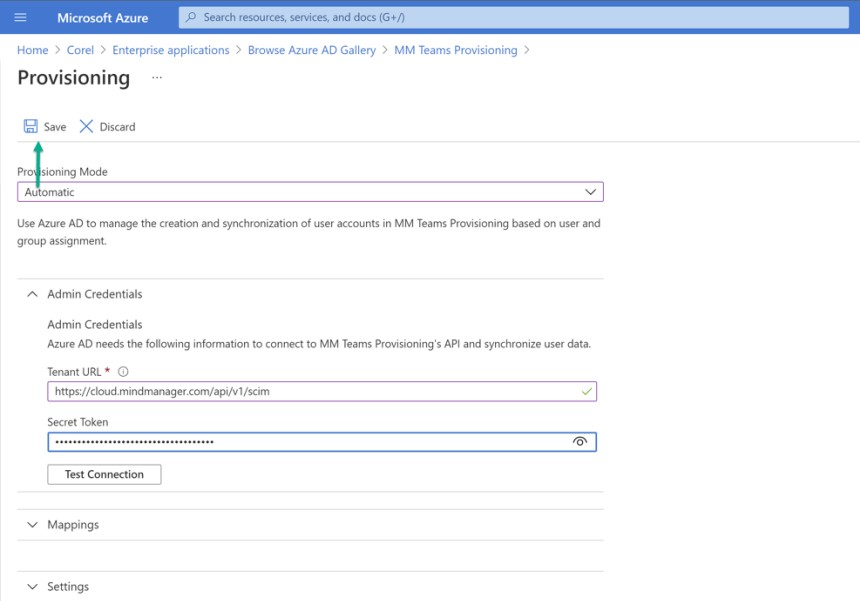
15
Click the
Test Connection button.
If there is an error, please confirm the previous steps were completed correctly or contact MindManager technical support.
17
Click the
Refresh button in your browser or navigate back to the
Provisioning section of the Enterprise Application you created.
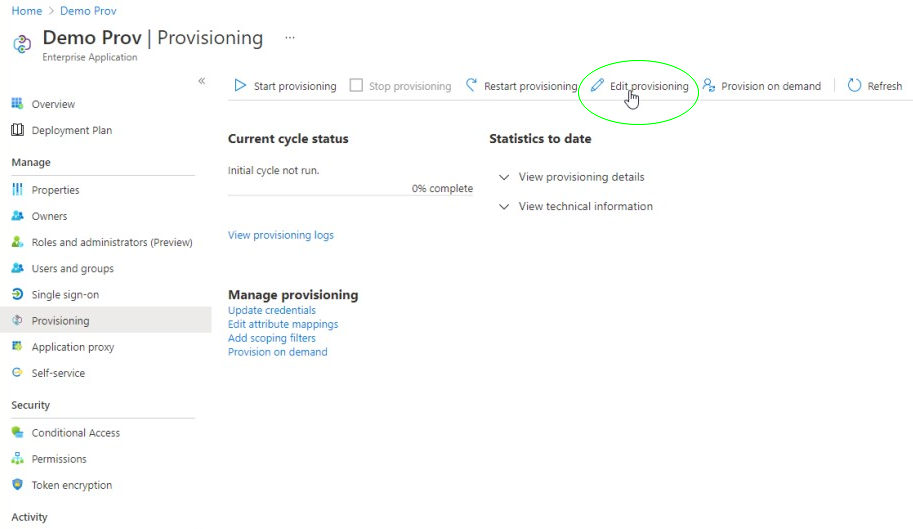
18
Click
Edit Provisioning.
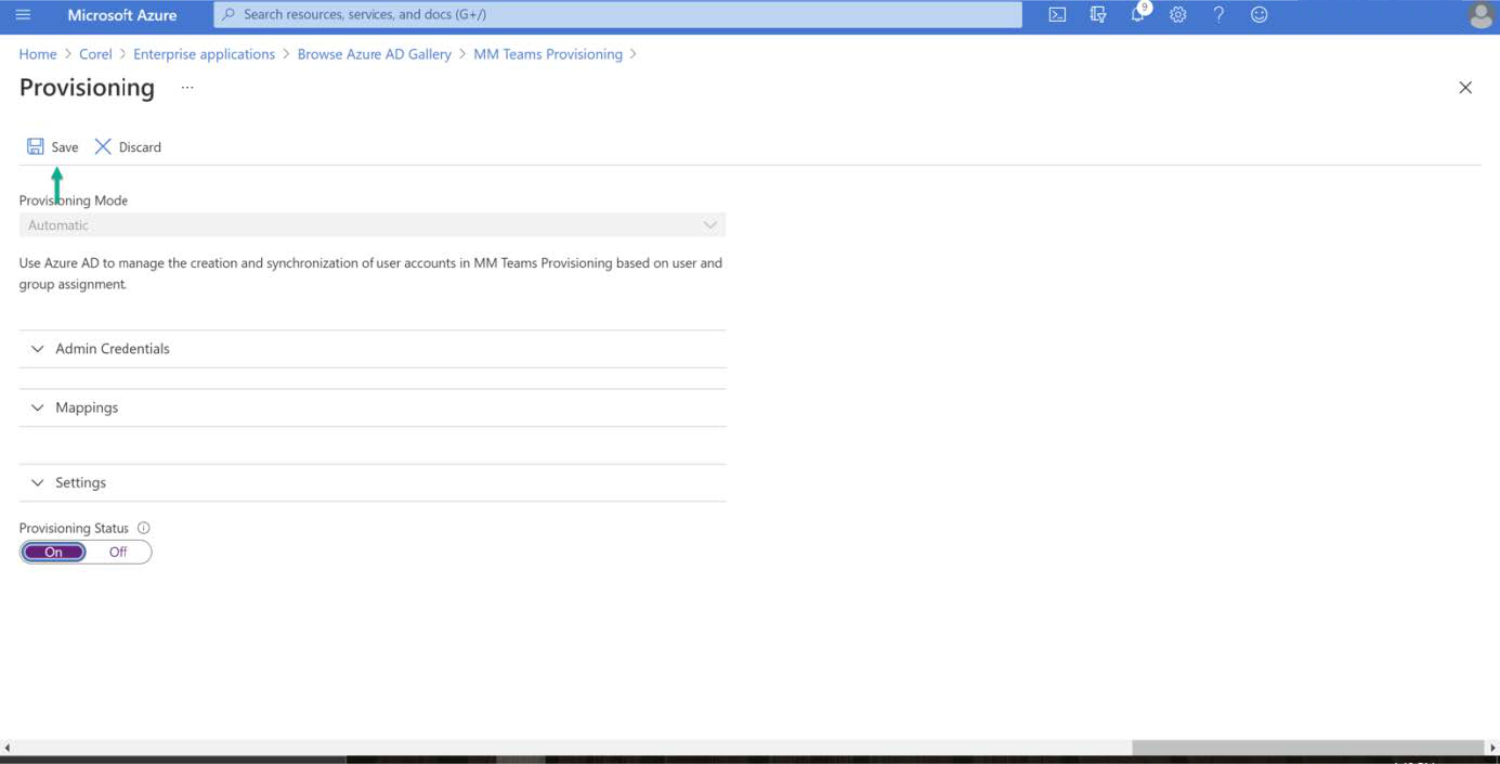
19
Set the
Provisioning Status setting to
On.
21
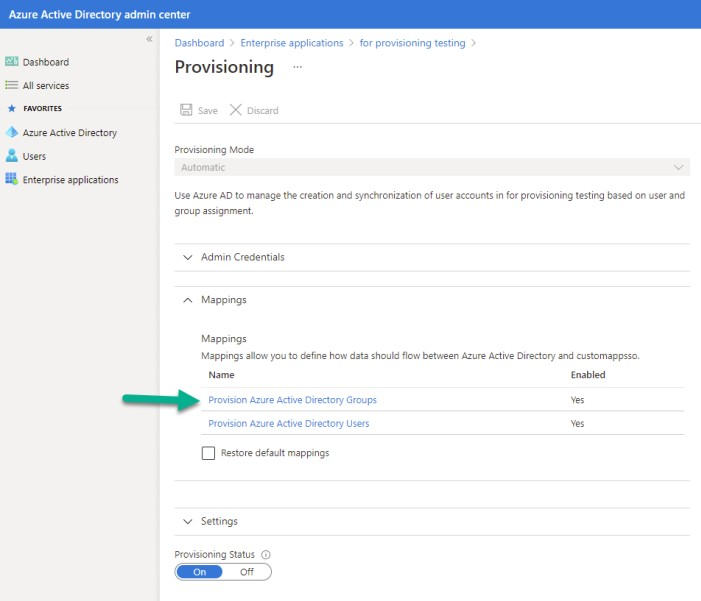
Expand the
Mappings section of options.
22
Click
Provision Azure Active Directory Groups.
23
Click
Add New Mapping, and add the following Azure Active Directory attributes:
•
displayName with the attribute
displayName•
objectId with the attribute
externalId•
members with the attribute
members
25
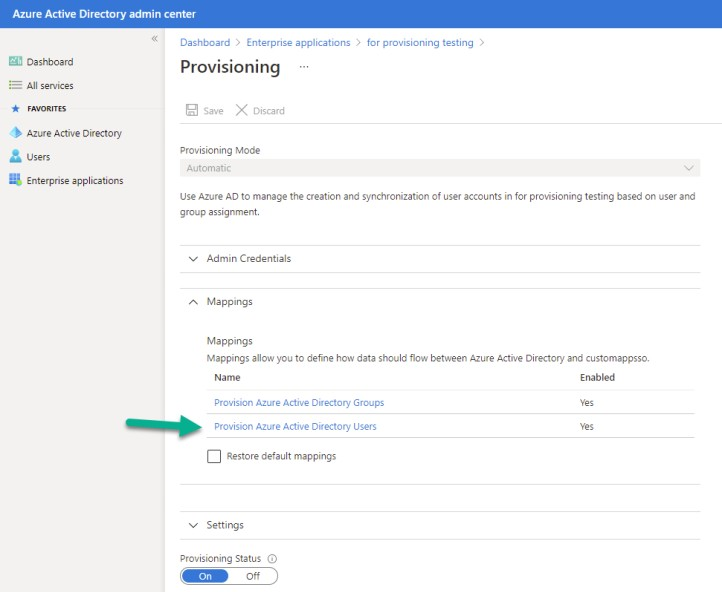
Return to the
Provisioning page.
26
Click
Provision Azure Active Directory Users.
27
Click
Add New Mapping, and add the following Azure Active Directory attributes:
•
mail with the attribute
userName•
Switch with the attribute
Active•
displayName with the attribute
displayName•
objectId with the attribute
externalId
29
Return to the
Provisioning page.
30
Expand the
Settings section of options.
31
Choose
Sync only assigned users and groups from the
Scope drop-down menu.
32
Click
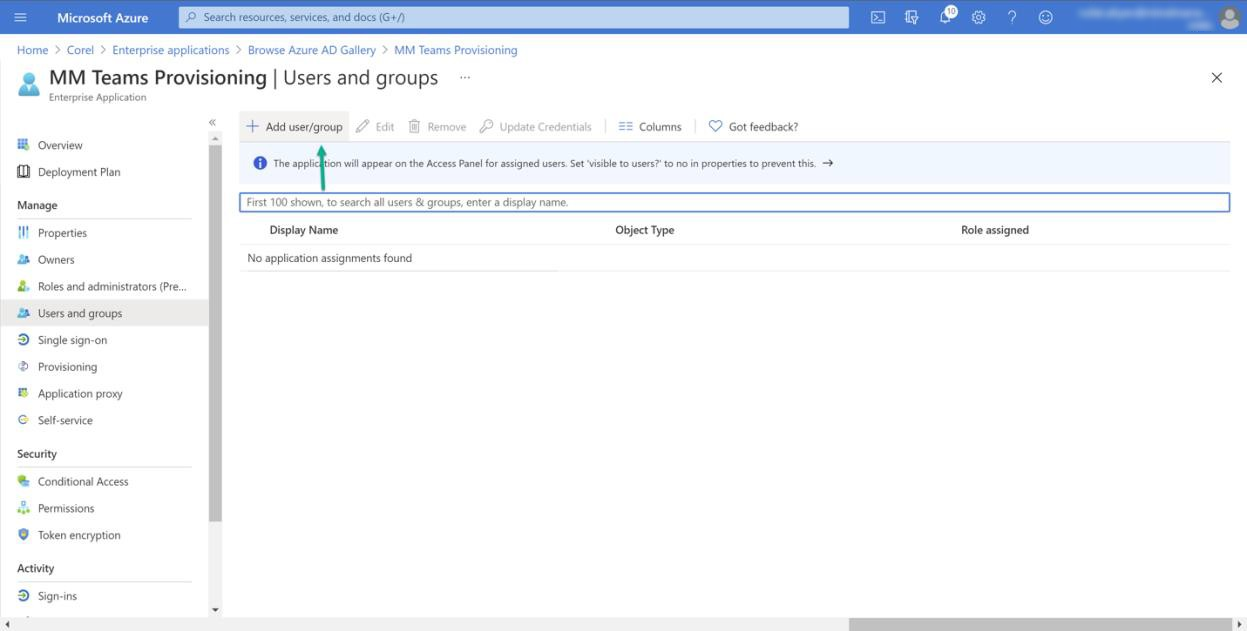
Users and groups in the left panel.
33
Click
Add users/groups.
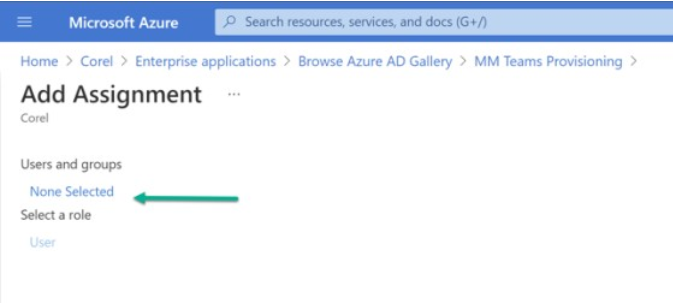
34
On the
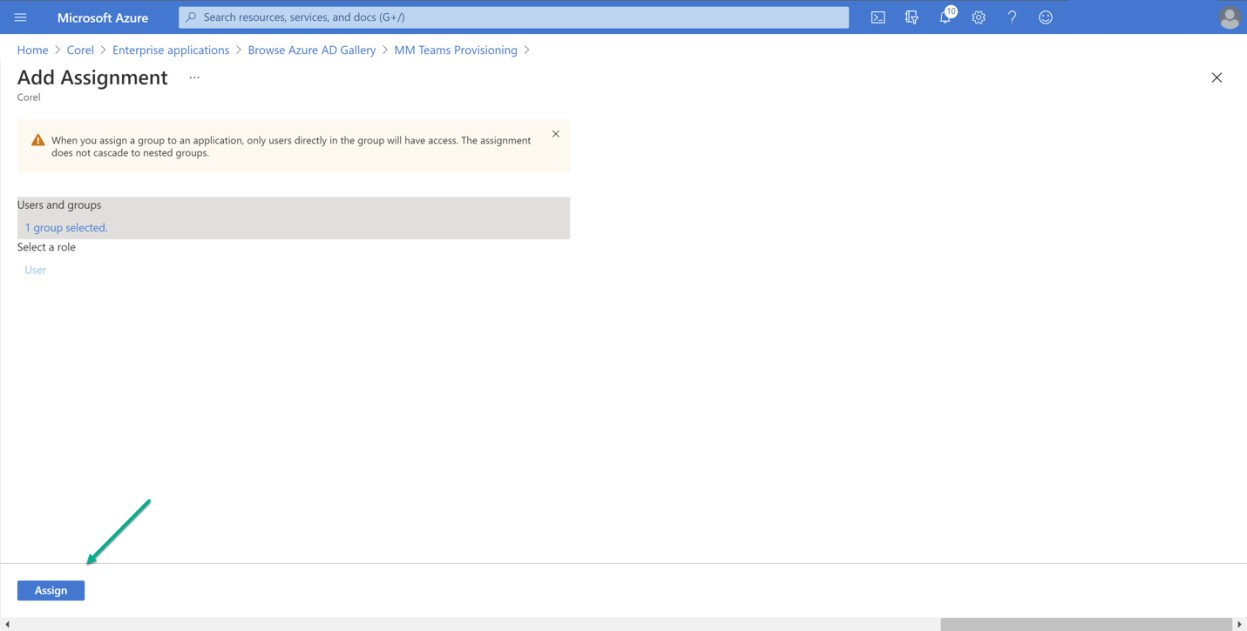
Add Assignment page, click
None Selected in the left panel.
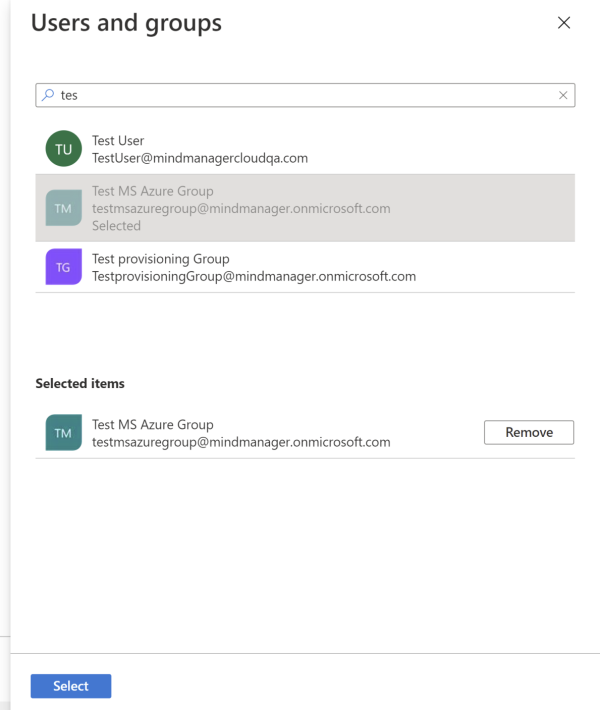
35
Select the groups to sync with the MindManager licensing system in the
Users and groups dialog.
36
Click
Select at the bottom of the
Users and groups dialog.
The selected group is listed.
Group synchronization from Azure to MindManager begins.
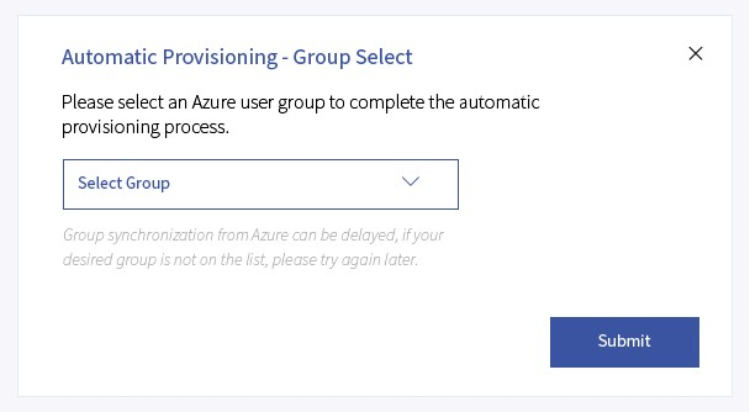
If one or more groups have been, the
Group Select dialog opens.
Note: Group synchronization from Azure can be significantly delayed, if the Group Select screen is not loading or if you don’t see the correct group in the drop-down menu. If you experience a delay, please wait and retry later. If the group still isn’t displaying after 72 hours, please contact MindManager technical support.
39
Select a group for automatic license provisioning from the drop-down menu.
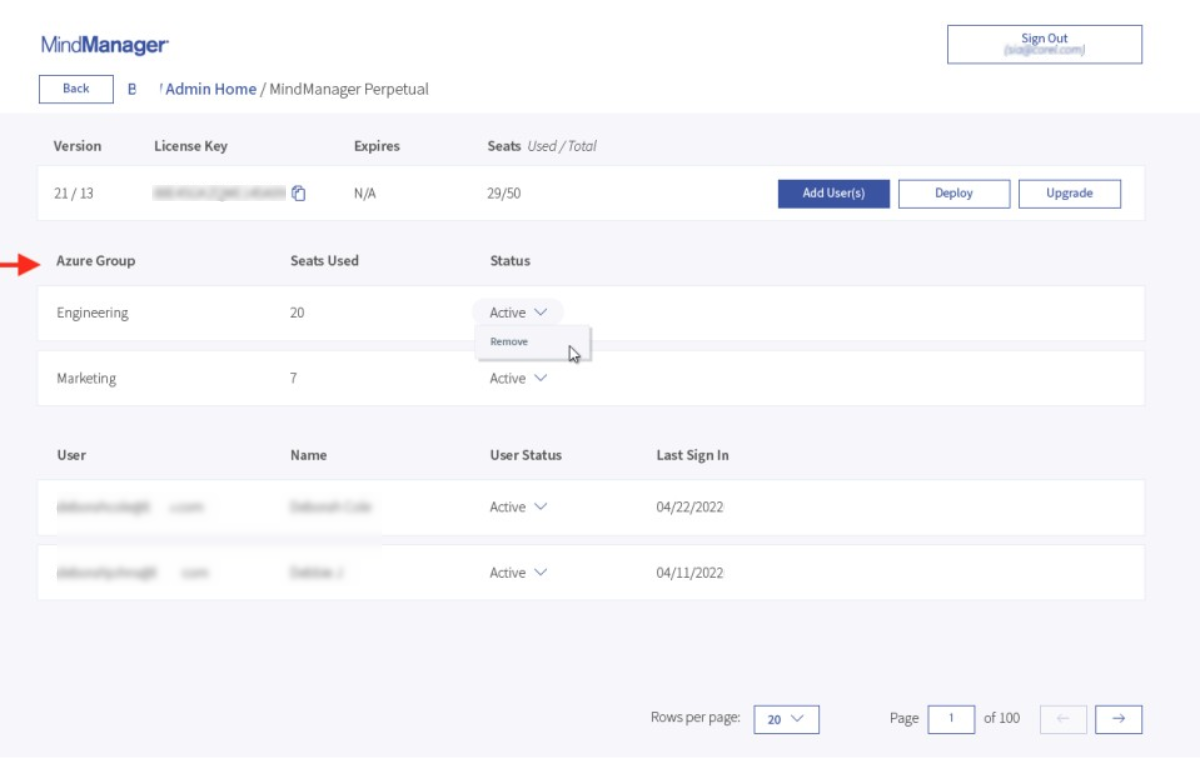
If you see the selected Azure groups listed on the license detail Admin page, the automatic license provisioning setup is complete.
Licenses will be automatically assigned and removed to members of the listed groups.

If you need to restart the process with a new Secret Token, please contact technical support to request your Automatic provisioning setup be reset.
Changes made in the Microsoft Azure Admin portal that were previously synced to the MindManager system can take up to 72 hours to take effect. For example, these type of changes include disabling automatic provisioning, deleting or removing the custom application, removing groups, or changing settings.