Set up Okta SSO
You can use SAML to set up Okta SSO. You must you have access to your Okta admin dashboard. Then, you must submit your setup details in the MindManager Customer Admin Portal.
To configure a SAML connection using the Okta admin dashboard
After you’ve logged in, it may be possible to go directly to the page for creating your custom MindManager app integration with the correct URL and skip to step 6.
The URL will have a special prefix for your account. In this example it’s prefix-123, and your logged-in URL would look like:

You can go directly to the page to create a new app integration by adding -admin to the prefix and /admin/apps/saml-wizard/create after okta.com, like in this example:

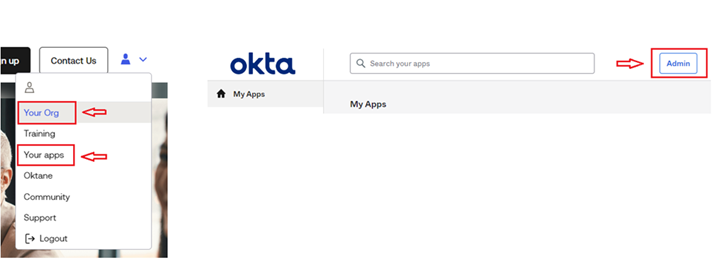
If you signed in using https://www.okta.com, you can reach the admin dashboard by clicking Your Org or Your apps in the drop-down below your profile icon and then clicking the Admin button to the left of your user name at the top of the next page.
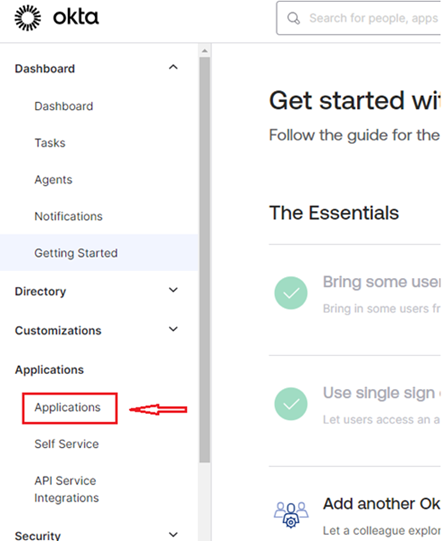
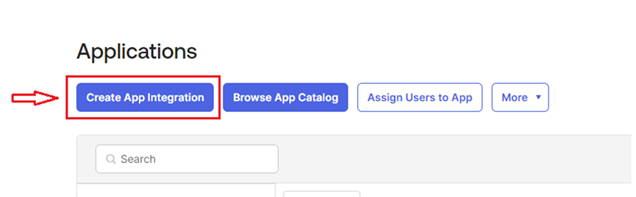
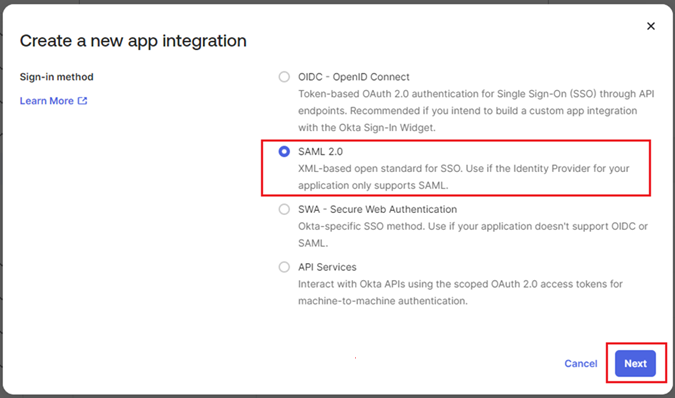
6
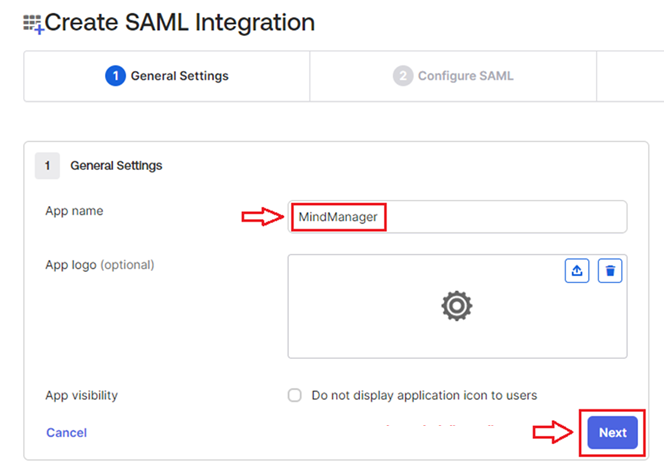
On the General Settings tab of the Create SAML Integration page, enter a name in the App name box, and click Next.
MindManager is a suggestion in this example, but you can call it anything you like. You also have the option of uploading an app logo and choosing whether to display the logo to users.
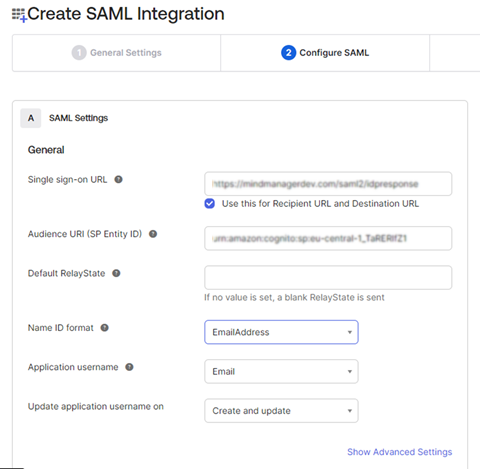
For example, if the current user pool page shows user-pool/oauth2/idpresponse, change it to https://user-pool/saml2/idpresponse after you paste it into the Single Sign-on URL box.
Note: If you are making an update to an existing SSO configuration, use the Single Sign-on URL and Audience URI from the existing configuration.
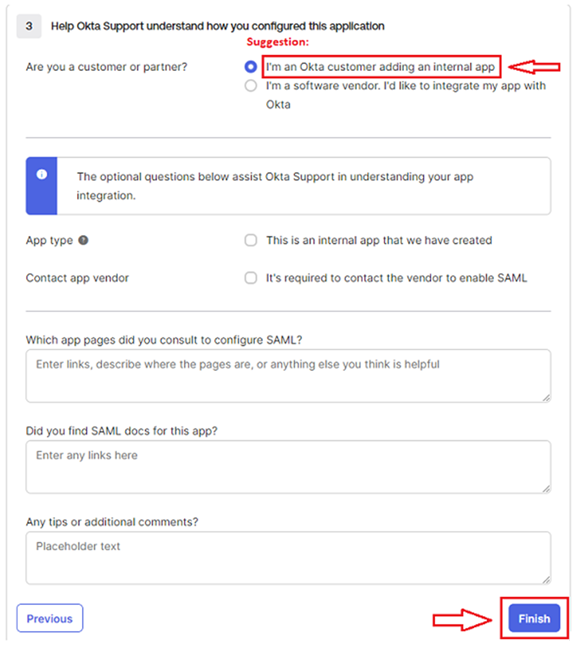
We recommend selecting the I’m an Okta customer adding an internal app option, then filling out the survey, and clicking Finish.

IMPORTANT: You can’t log in from the non-admin Applications page (that’s accessed without clicking through the Okta admin dashboard).
To submit setup details using the MindManager Customer Admin Portal
3
On the Setup SSO page, select Okta (SAML) from the Choose Your Single Sign-on Provider drop-down menu.
4
On the Setup SSO page, input the list of domains that you want to be redirected to use your organization’s Active Directory to sign in. This usually is the company domain, and you can include additional domains that fall under the same active directory. For example, Corel’s is corel.com, as well as mindmanager.com. Anyone with @corel.com or @mindmanager.com email address will be redirected to Corel’s Azure AD for sign-in.
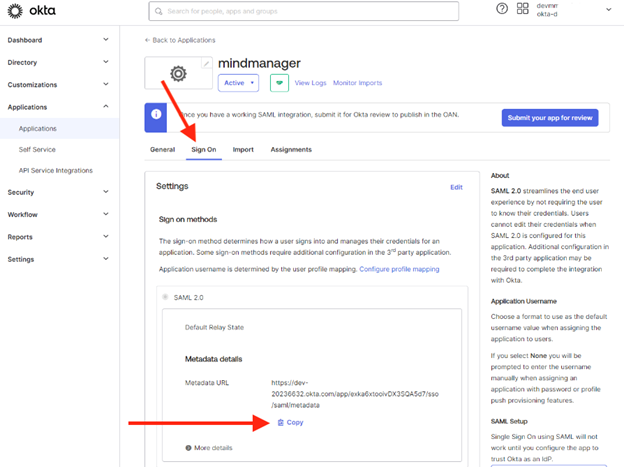
• App Federation Metadata Url — data copied in step 24 of To configure a SAML connection using the Okta admin dashboard.
You will receive an email confirmation from noreply@mindmanager.com that we have successfully received your setup request has been successfully submitted. Check your spam or junkmail folders if you haven’t received the confirmation eamil.
• Domain Verification — for more information, see Domain verification.
• Ready for Testing — once your submission is reviewed and approved, you will get another email notification that your setup is ready for testing. The status in the MindManager Customer Admin Portal is displayed as Ready for Testing. Follow the instructions in the MindManager Customer Admin Portal to test your setup. If everything is working as intended, setup is complete.